Task configuration is mandatory and must be completed before creating your first shifts. This allows you to specify different work situations within a single shift, ensuring a precise distribution of responsibilities and better visibility of your staffing needs.
Here is how to do it:

To create new tasks or modify existing ones, follow these steps:
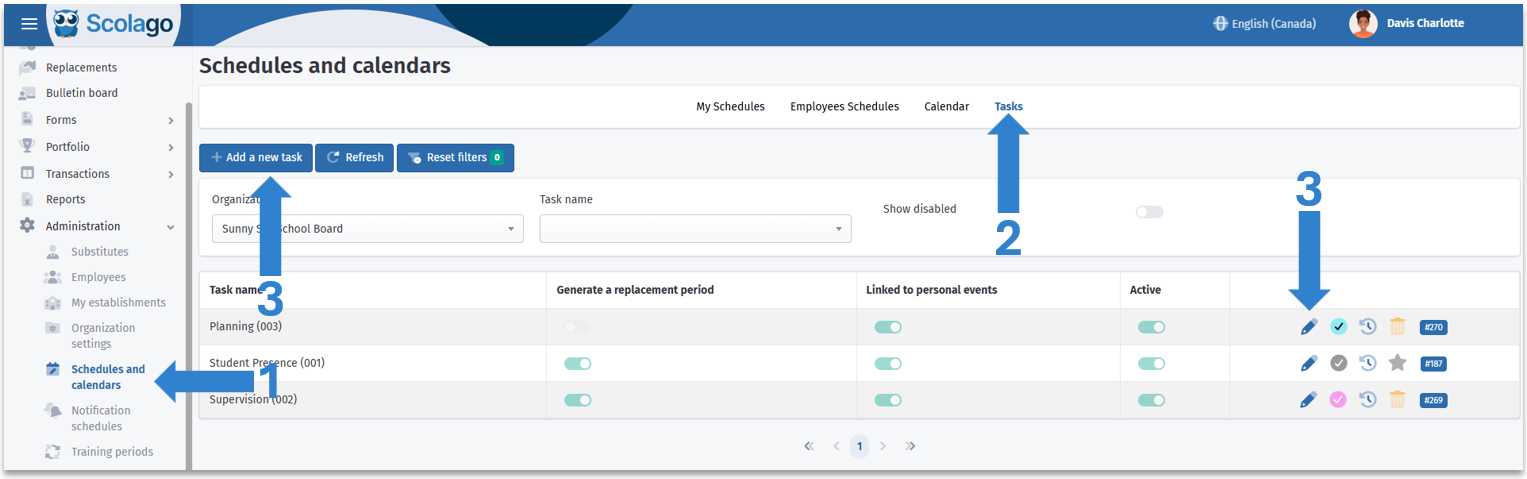
- Go to the Work shifts module in the Administration tab of the left-hand menu;
- Click on the Tasks tab;
- If you want to create a new task, click on Add a new task. If you want to modify an existing task, click on the pencil icon of the corresponding task.

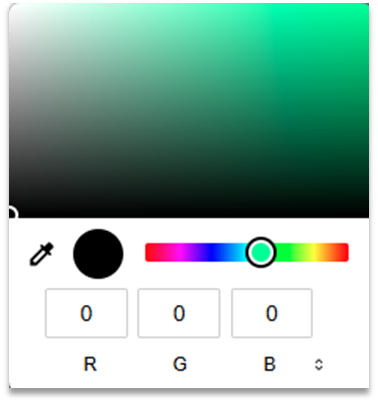
A window will open, either called Create a new task or Edit task – [task name]. The windows are identical, except that the second one will contain the current settings.
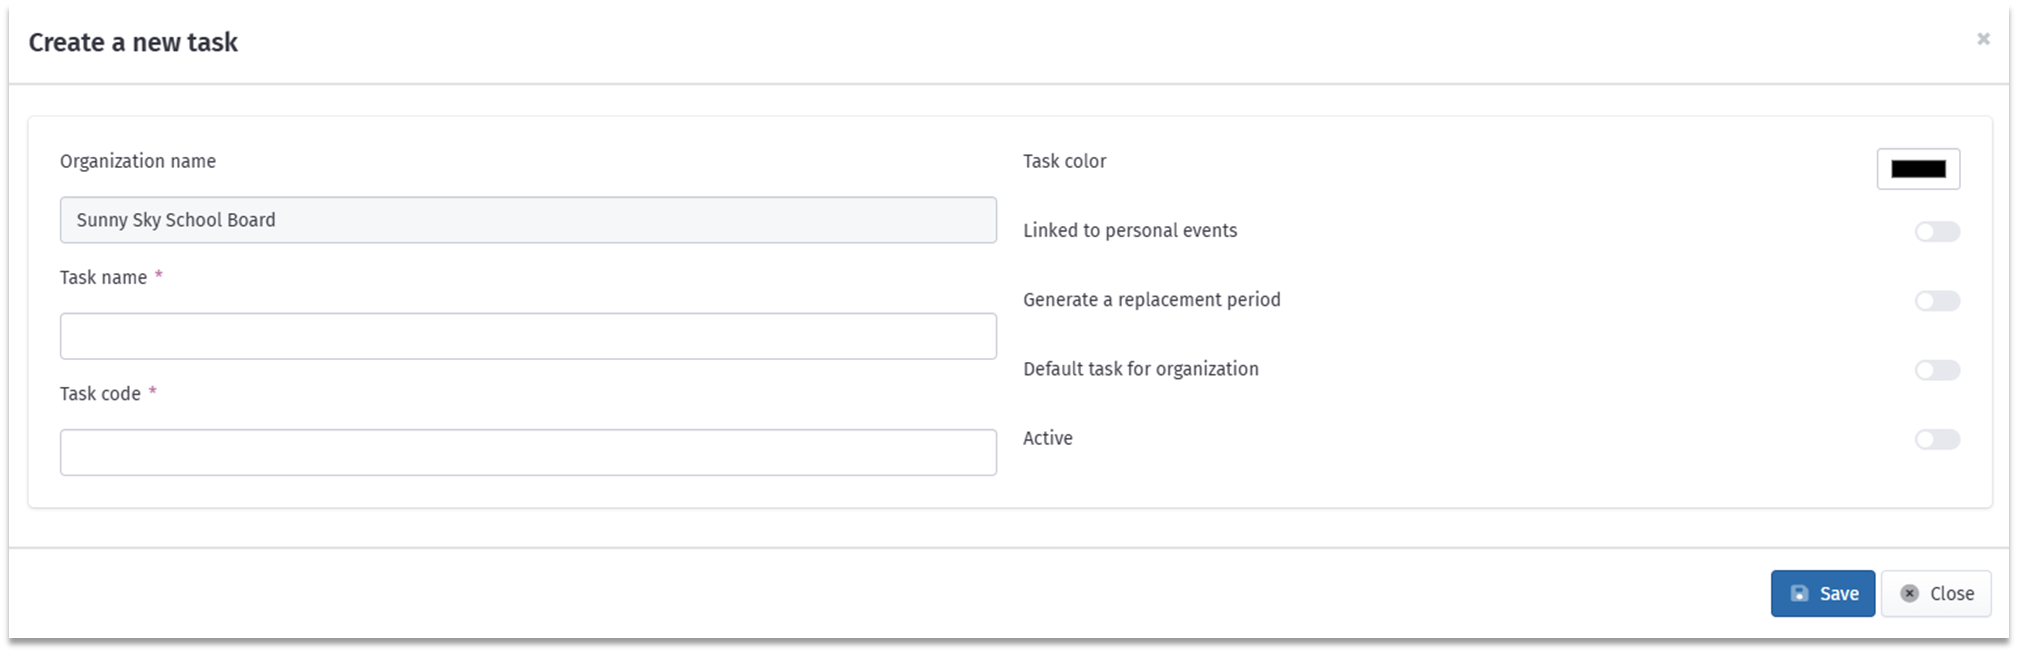
One additional option may be available depending on your organization’s settings. In fact, based on the chosen absence minutes calculation method, a new toggle named Include in absence duration duration may appear. If that’s the case and you activate it, the minutes of the period marked with this task will be deducted from the employee’s pay.
|


Click Save. Your new task will appear in the main view of the Task tab.
Don't forget to inform your staff about each task to ensure proper understanding.
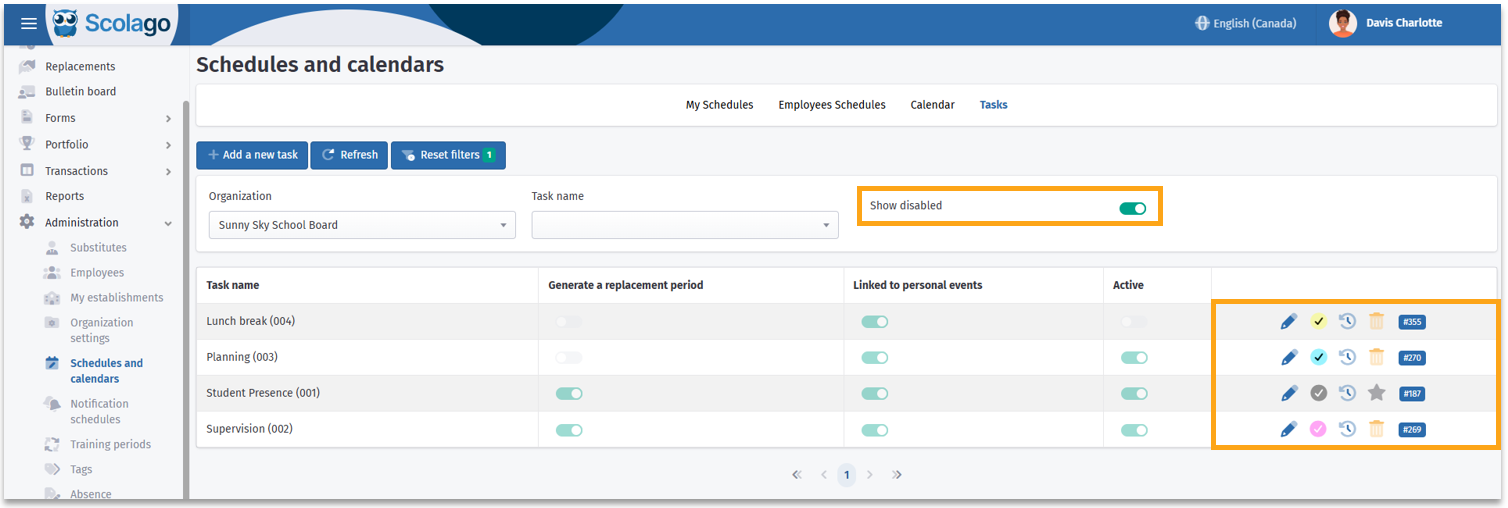
In this location, the toggle Show disabled allows you to show or hide your inactive tasks.
Furthermore, the last column informs you on each task:
- The color checkmark lets you instantly identify the color assigned to this task;
- The clock icon gives you access to the history of this task;
- The star icon indicates that this is your organization’s default task — that is, the one selected by default when creating an employee schedule ;
- The trash icon allows you to delete the task;

Caution, note that it is not possible to delete the default task or a task that is used in an employee's work shift.
- The number represents the unique ID of this task.


For more information on this module, refer to this article: How does the "Agenda" module work?
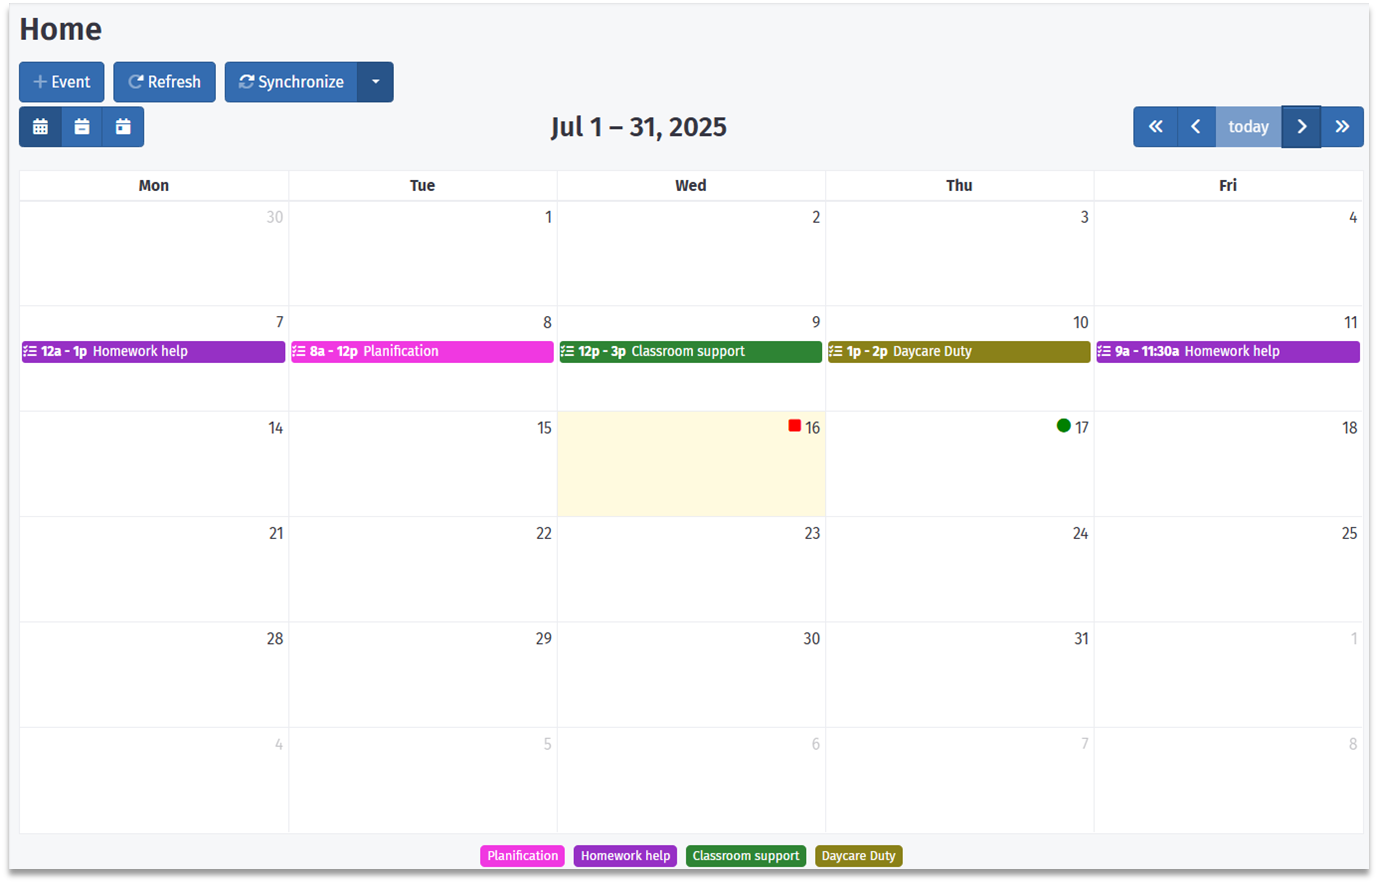
These tasks will be displayed in the employee’s Home module, including at the bottom of the page a legend showing the color of each task.
Was this article helpful?
That’s Great!
Thank you for your feedback
Sorry! We couldn't be helpful
Thank you for your feedback
Feedback sent
We appreciate your effort and will try to fix the article