Caution, this article is for organizations that do not have their schedules and calendars synchronized. If your organization uses this synchronization, this article may not be relevant for you. To find out if the employee's schedule is synchronized, go to the Schedules module. The arrows icon will indicate if the employee's schedule is synchronized. In this case, you probably don't need to create one. |


The employee schedule simplifies your substitution requests by automatically generating periods, thereby reducing the risk of errors (e.g., forgetting to inform the substitute about a bus supervision period).
You can have more than one schedule. If multiple schedules need to be considered, they will overlap to accurately reflect all the periods you need to be replaced during a single day of absence.

By default, the schedule includes a task named Student presence, which represents the times when you must be replaced in case of absence. For each period involving student presence, you can specify the room number where the work is to be performed and the group number.

Here is a step-by-step guide on how to configure your employee schedule:

In the left-hand menu, click on Administration, then select Schedules. Next, click on New employee schedule.
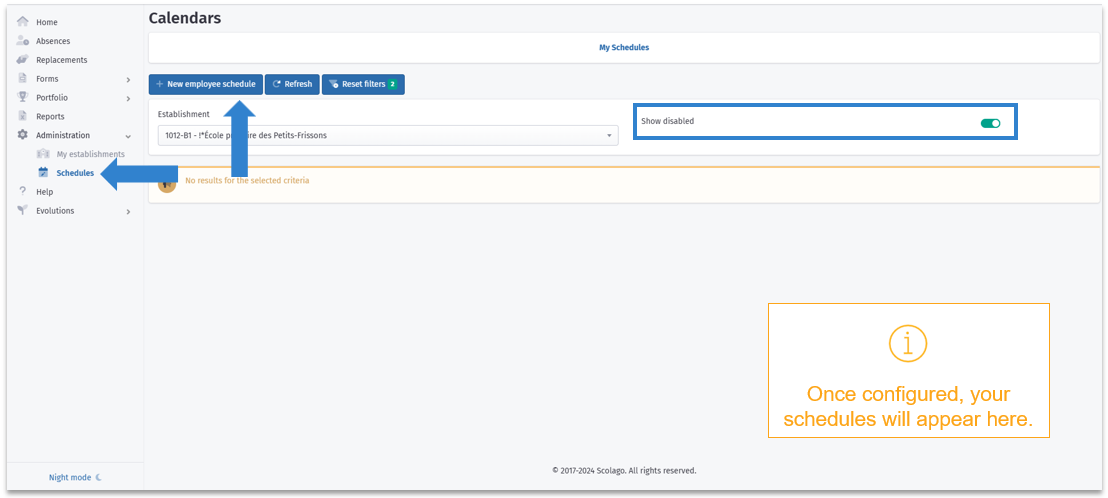
The Show disabled switch allows you to view your inactive employee schedules. This button can be useful for locating a schedule that was forgotten to be activated.

Fill in the fields of the form.
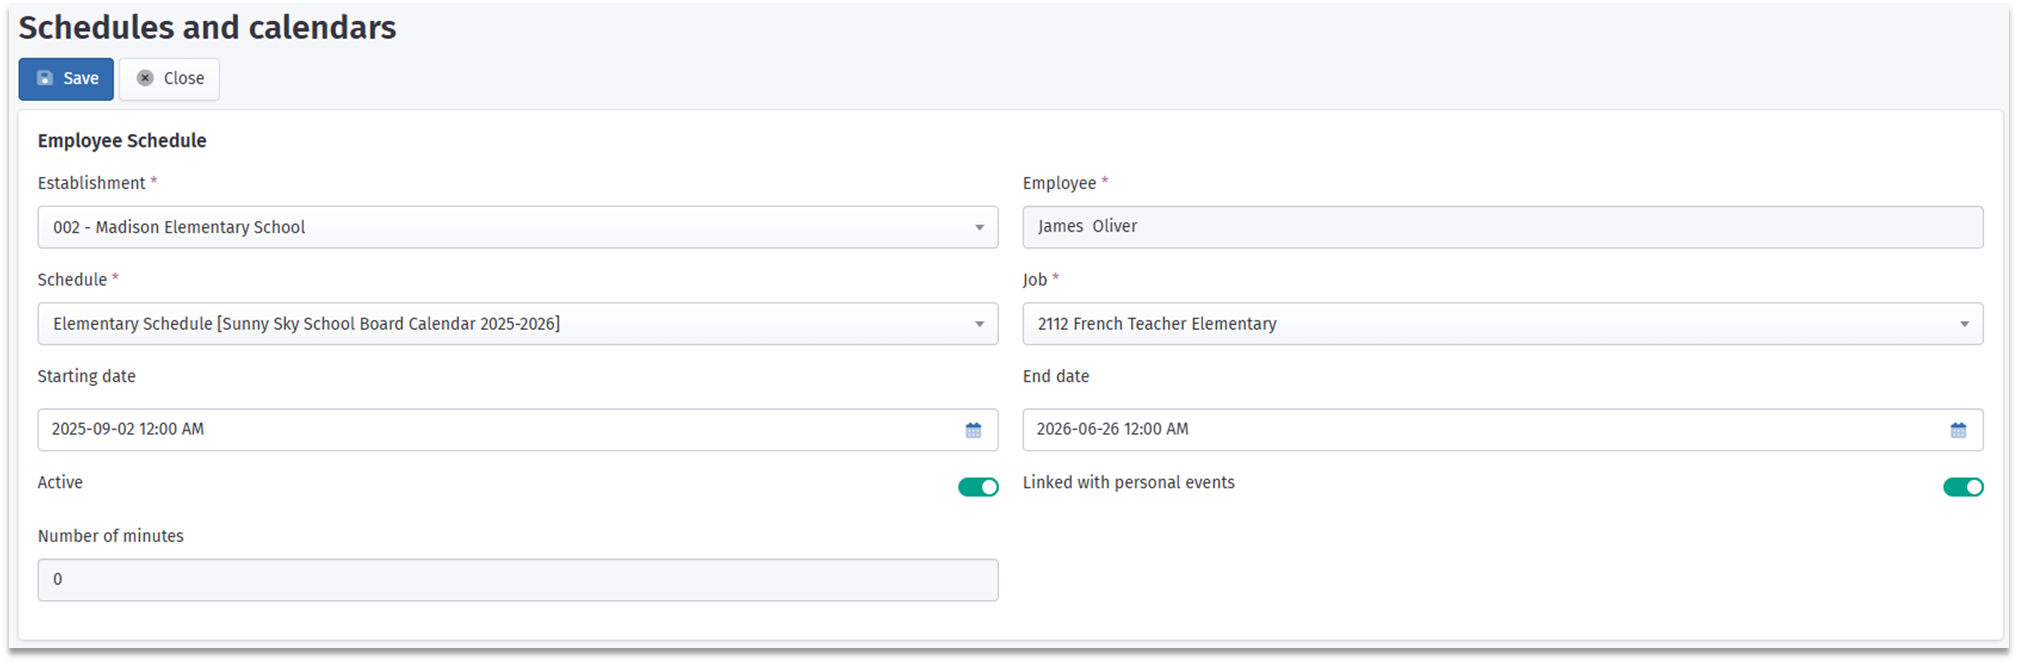
Click Save. Once saved, the information cannot be modified, but you can delete the generated schedule if needed.

Once the data is saved, a new menu appears. This menu allows you to specify the times when you are working. If necessary, it also lets you indicate the group number and the room number where the work must be performed for each period. There are two ways to proceed:
1. In the Default Local and Default Group fields, enter the corresponding information. Example: if on days 1, 3, and 5 during the first period you work with group 44 in room 206, enter 44 in Default Group, then 206 in Default Local. 
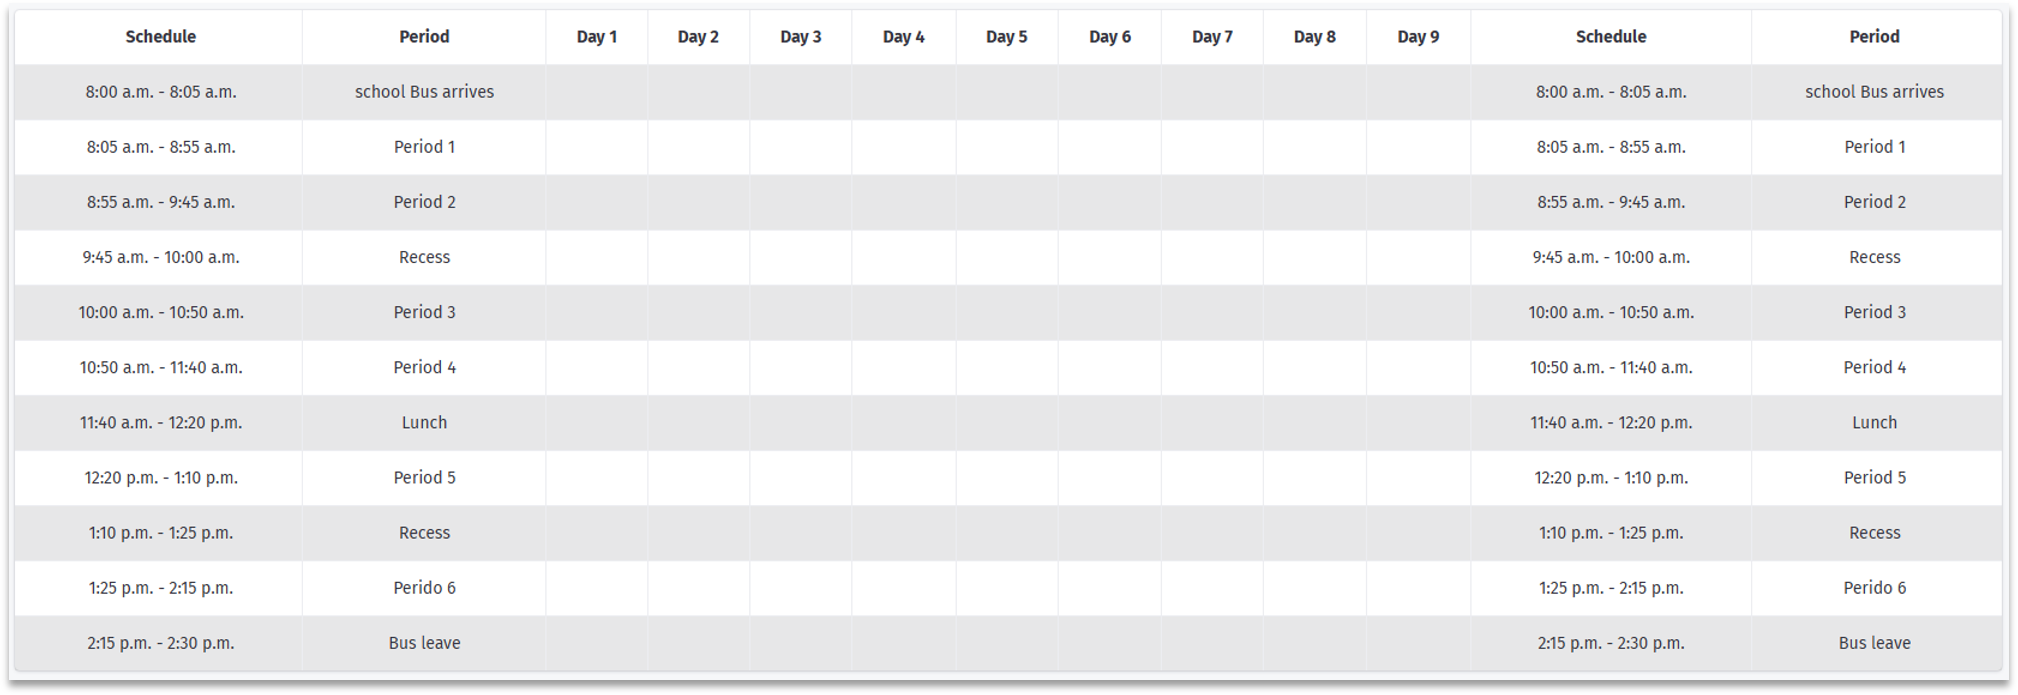
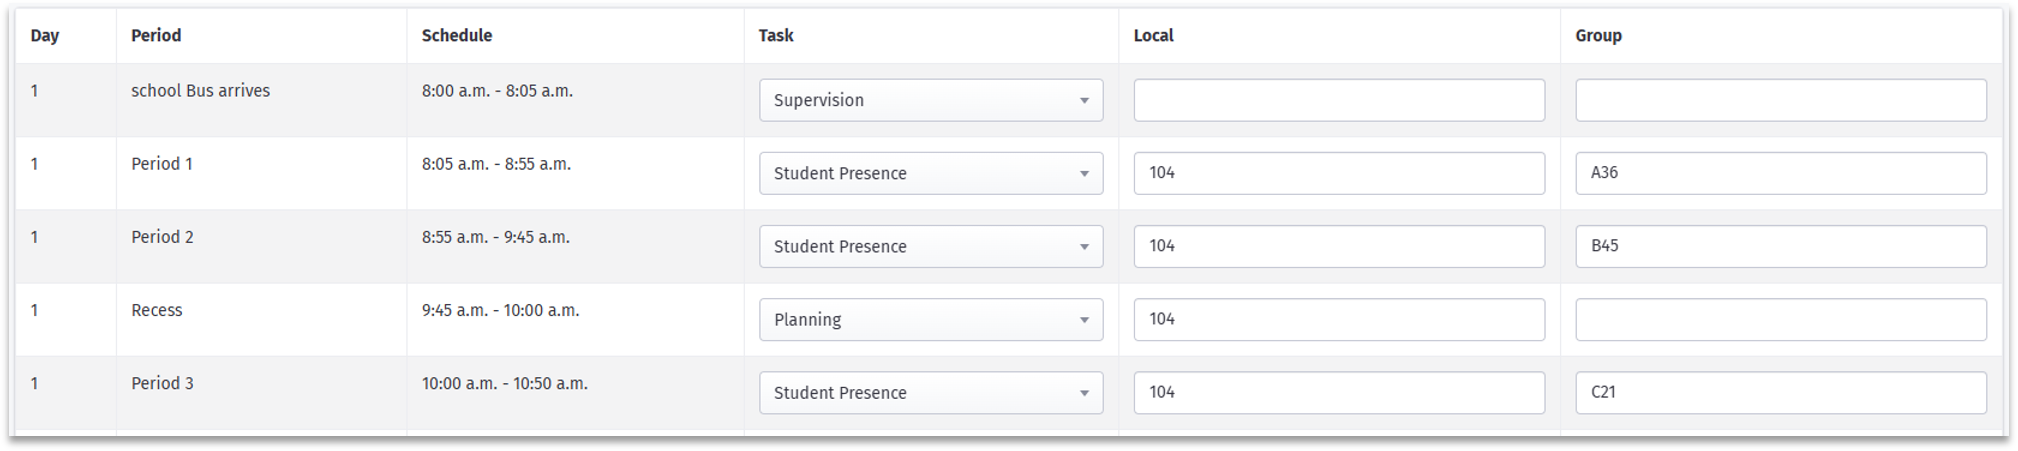
1. Directly in the grid, click on all the cells of the schedule where you are assigned to work.
To be more efficient, you can check multiple boxes with a single click: hold down the left mouse button, then drag it across the table! To "uncheck" boxes, simply click inside them again.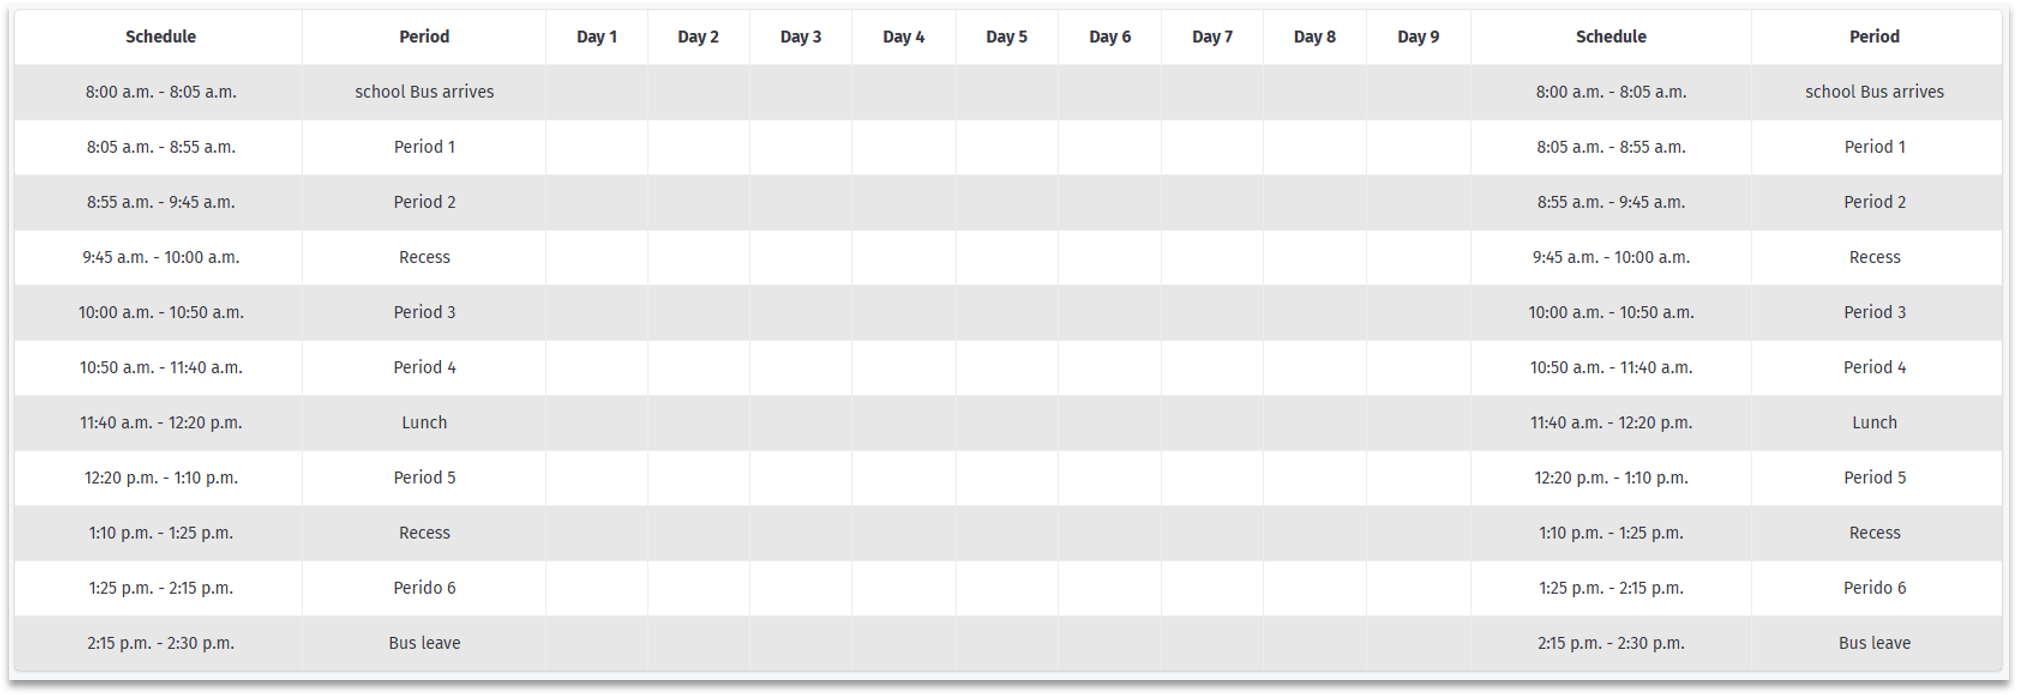


Note that it is also possible to delete all the data entered in the grid by clicking on Clear Table.
 Note that your organization may use different tasks. If so, we invite you to consult this article to learn more: Employee - What are tasks and how to use them?.
If your organization is synchronized with Paie & GRH for payroll data export, an additional section will be available at the bottom of your schedule. There, you'll be able to view the daily total of educational minutes and other minutes. The number of hours will vary depending on which boxes are checked, as well as on the configuration of the task used. 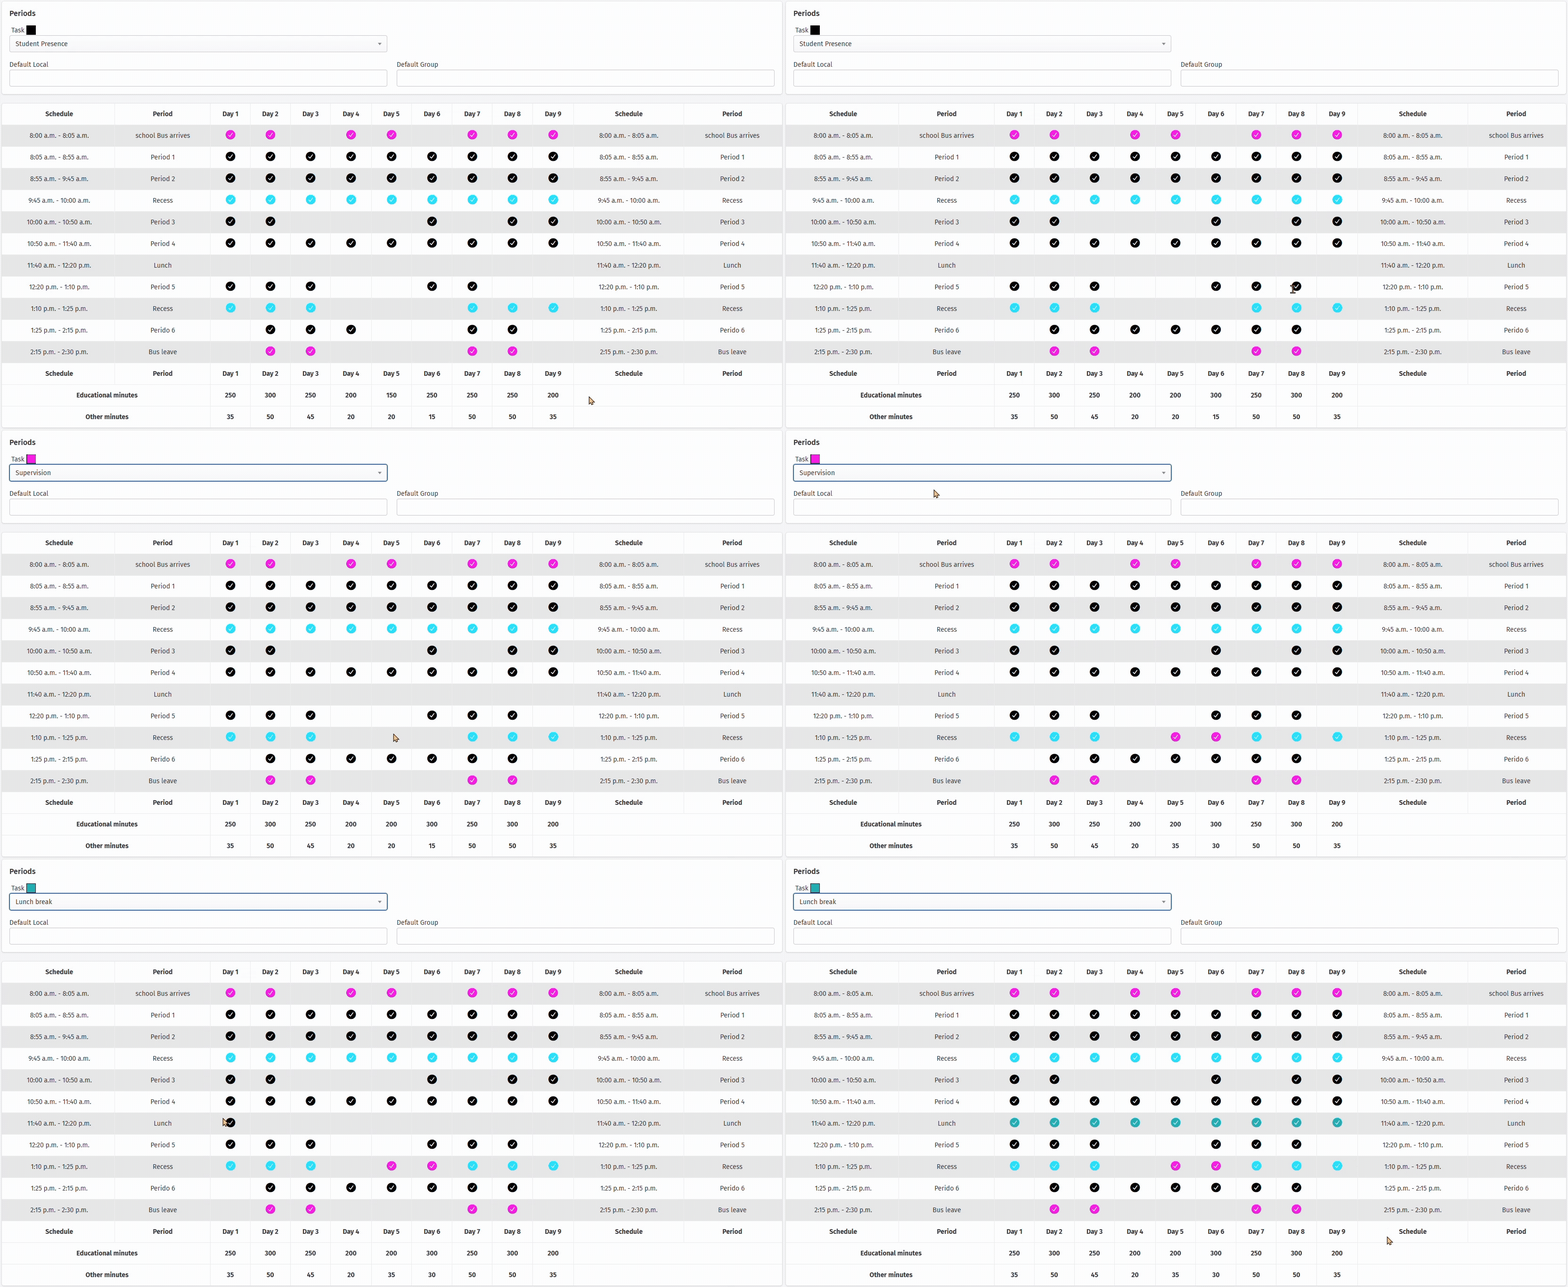 |

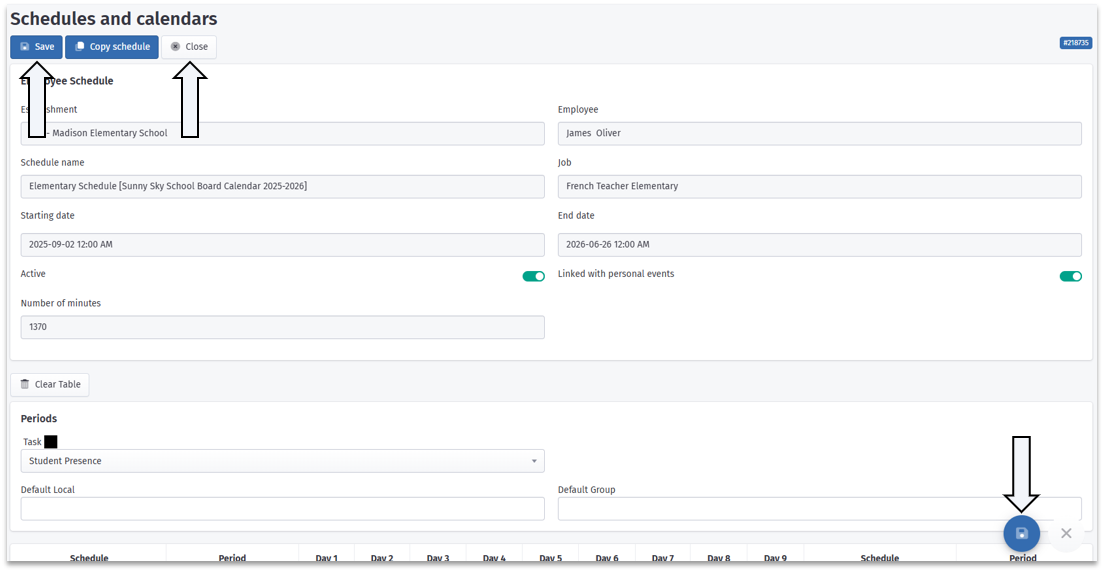
Don't forget to save by clicking on one of these two icons, then click on Close.
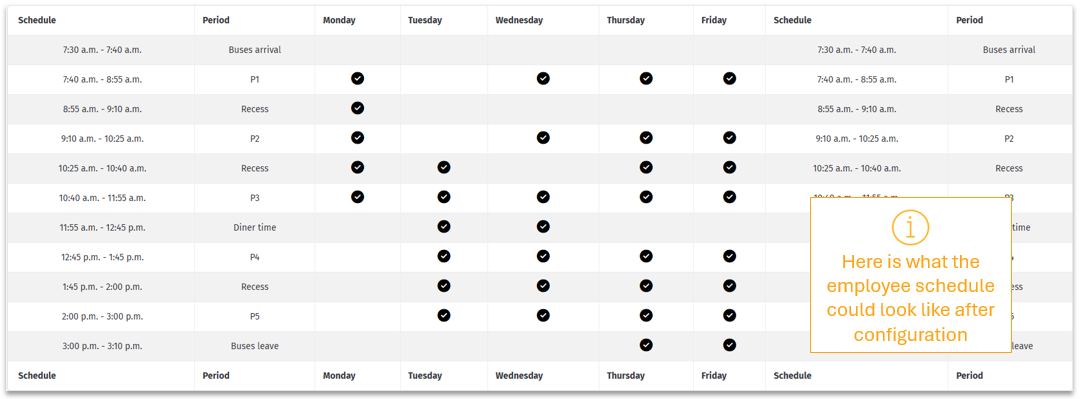
This is what will be displayed to substitutes in the replacement offers. 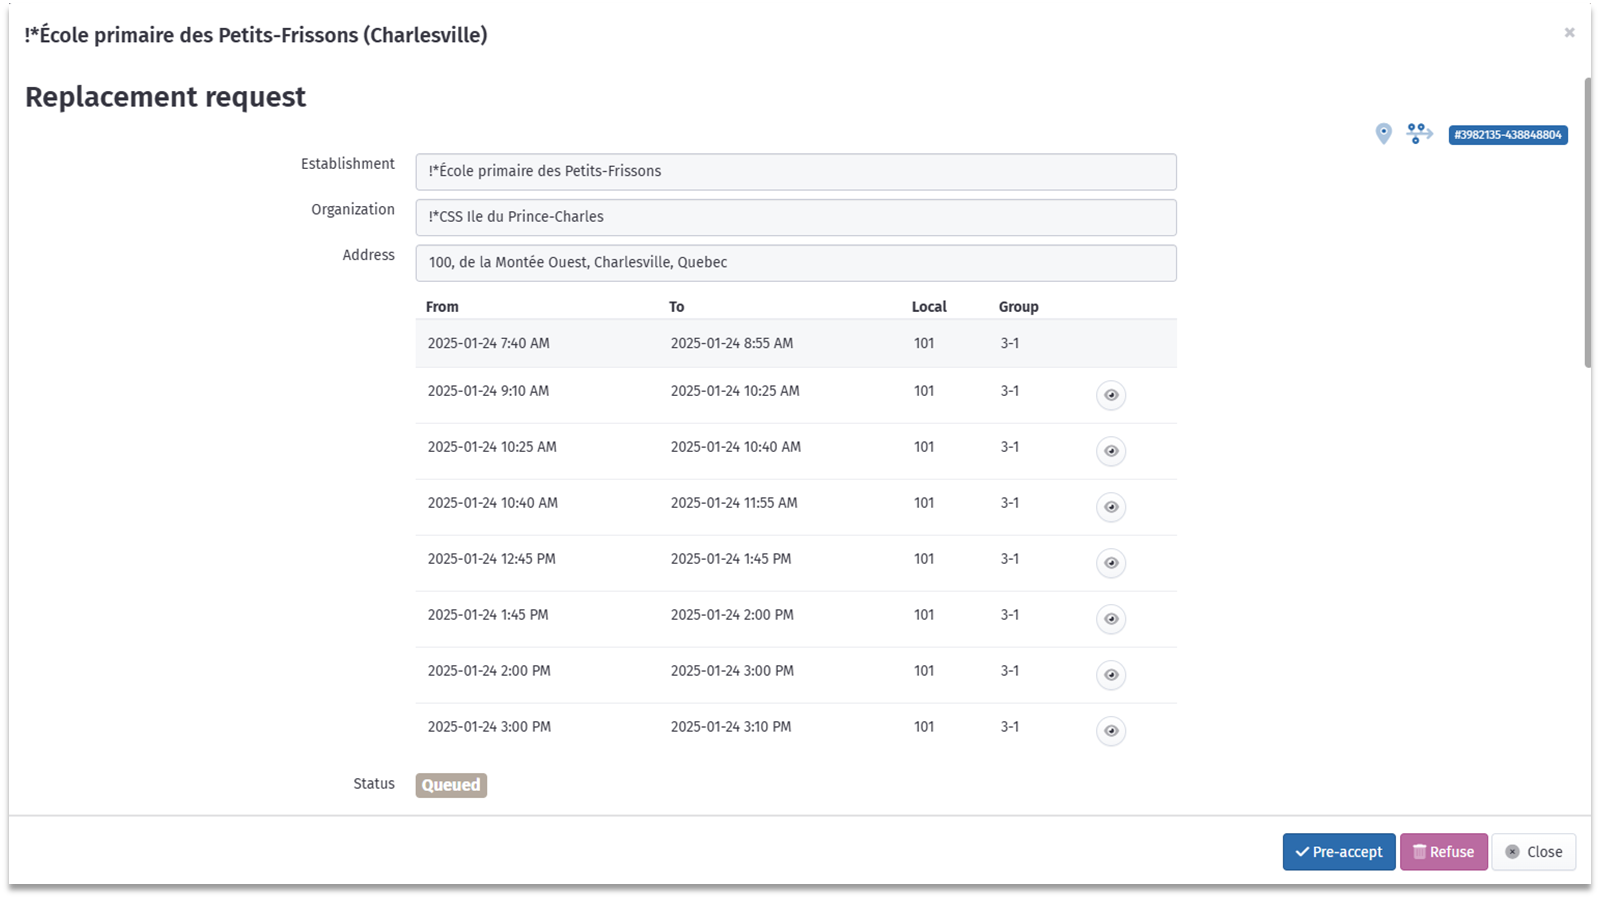

Here is a video on creating the employee schedule: Video: Employee - How to add my employee schedule?.
Was this article helpful?
That’s Great!
Thank you for your feedback
Sorry! We couldn't be helpful
Thank you for your feedback
Feedback sent
We appreciate your effort and will try to fix the article