In certain situations, it may be necessary to reassign a work shift already planned to another employee.
There are several ways to reassign a work shift:
- Manual reassignment from the Work shifts module;
- Mass reassignment from the Work shifts module;
- Manual reassignment from the Agenda module;
- Mass reassignment from the Agenda module.

Caution, when using mass reassignments, several periods of one or several employees could be assigned to the same person on the same time slot, generating overlaps. Please verify your information and ensure that they correspond to your intent.
If you have only one work shift to reassign, manual reassignment use can be done well, no matter from which module chosen. However, if you have several work shifts to reassign, mass reassignment might be a better choice, no matter through which module you do it.


For more information about the general functioning of this module, consult this article: How does the "Agenda" module work?

For more information about the employee view of work shifts, consult the following article: Employee - How to view my work shifts?
|
 Manual reassignment from the Work Shifts module
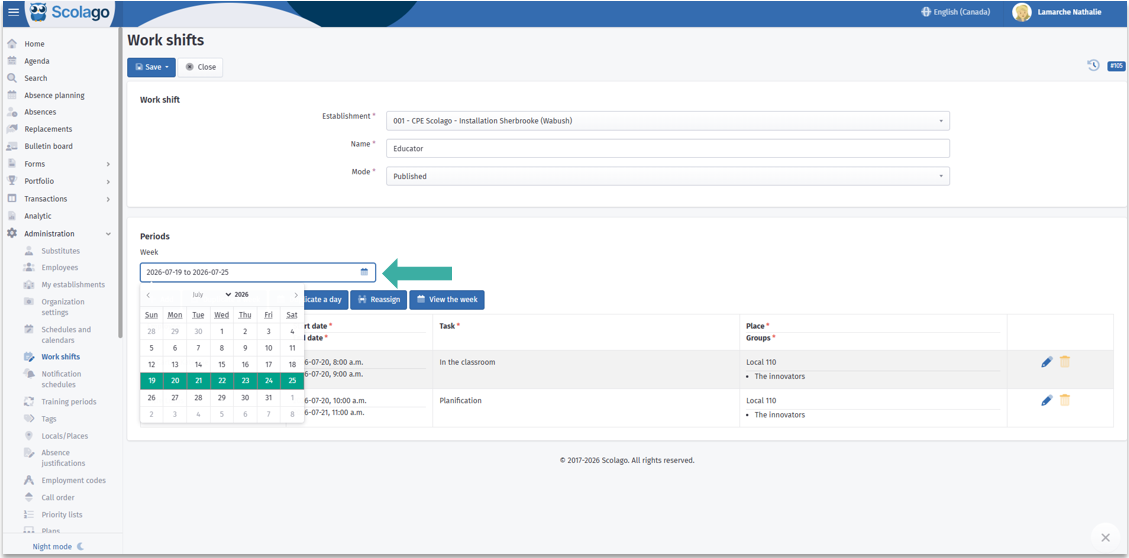
Access the Work Shifts module. Open the shift to modify by clicking the pencil icon to the right of the corresponding line;


By default, the week displayed will be the current one. If needed, select the concerned week;

To modify the desired periods, click the pencil icon for the corresponding period to edit its information. Make the desired changes, then click the Save icon.
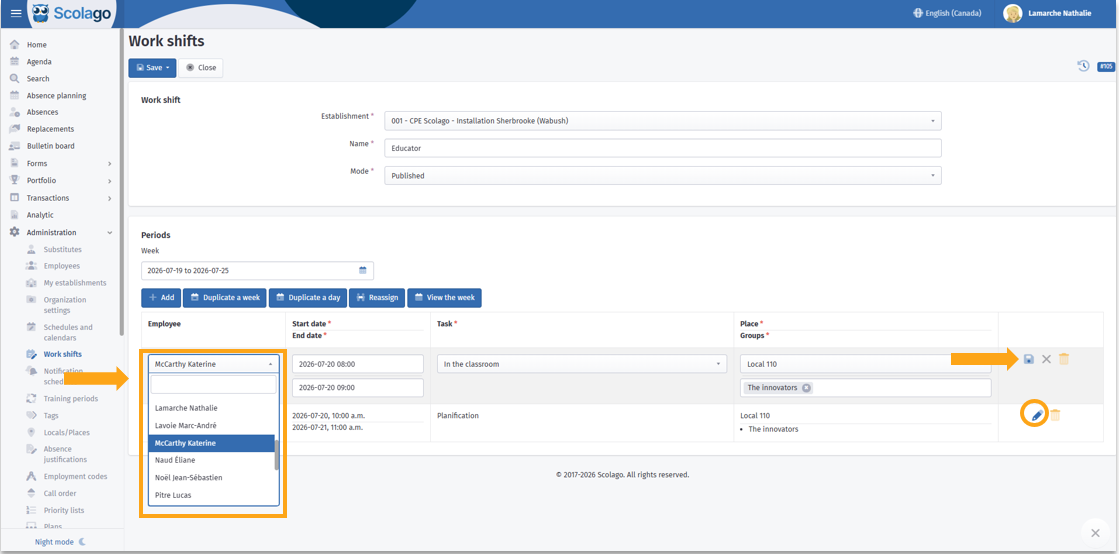

Once the information is entered, click Save, and choose one of the two following options:
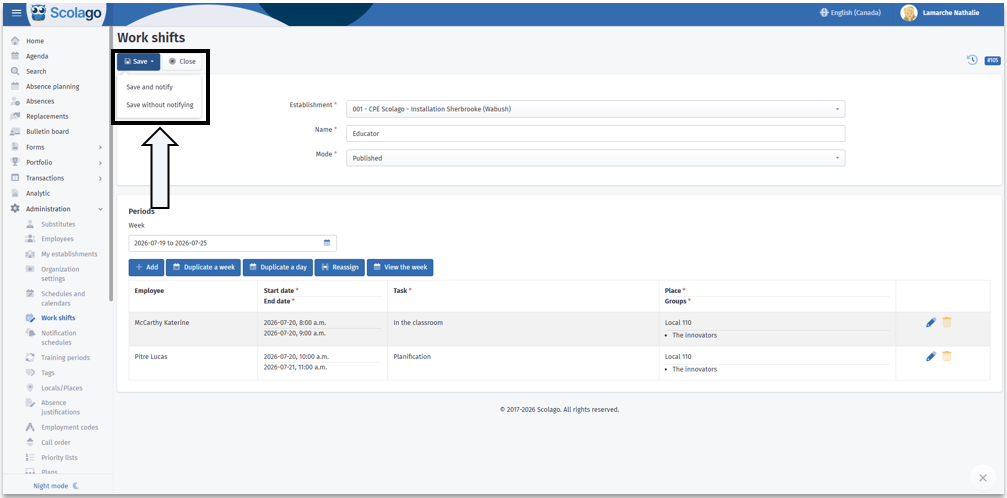
- Save and notify: notifies the targetted persons;
- Save without notifying: no notification will be sent.

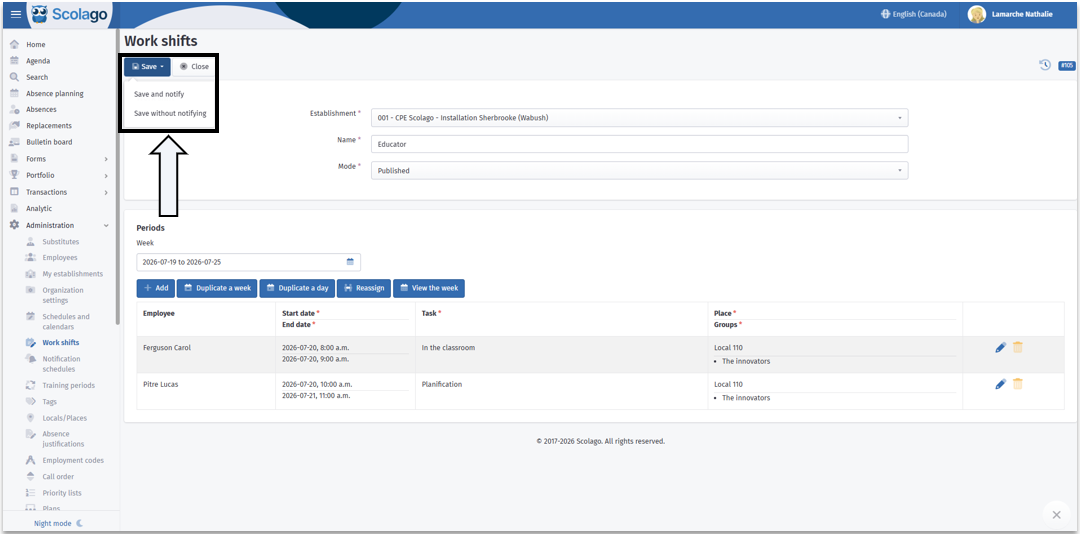
The new assigned shift will automatically appear in the Home module of the selected employee. It will also disappear from the Home module of the initially assigned employee. No action is required on their part.
|
 Mass reassignment from the Work Shifts module
First access the Work Shifts module. Open the shift to modify by clicking the pencil icon to the right of the corresponding line;


Once the work shift is open, click the Reassign button to display the reassignment form;


Here is how to use each field:

- Assigned employee: indicates the name of the employee or employees currently assigned to the work shift to modify;
- Employee: select the employee to whom you wish to reassign this shift, or select the option No employee to leave it floating;
Filters section lets you filter the periods to reassign, so only the periods having the selected task, place, and group will be reassigned. The other periods that do not correspond to these criteria will remain assigned to the current employee.
- Period: allows selecting the period(s) to reassign;
- Task: this filter targets a specific task type;
- Place: this field filters according to where the shift takes place;
- Groups: allows targeting one or several student groups associated with the shift.


Once the information is entered, click the Reassign button at the bottom of the window.
As with manual reassignment, you can then click Save, and choose one of the two following options:
- Save and notify: notifies the relevant persons;
- Save without notifying: no notification will be sent.

The new assigned shift will automatically appear in the Home module of the selected employee. It will also disappear from the Home module of the initially assigned employee. No action is required on their part.
|
 Manual reassignment from the Agenda module
Access the Agenda module, then choose the Work Shifts tab;


By default, the week displayed will be the current one. If needed, select the concerned week;


Click the period(s) displayed on the agenda that you wish to modify and modify the employee on the desired period(s). It is also possible to modify the task, place, and group(s) associated with this period.


Once the information is entered, click Save, and choose one of the two following options:

- Save and notify: notifies the relevant persons;
- Save without notifying: no notification will be sent.
The new assigned shift will automatically appear in the Home module of the selected employee. It will also disappear from the Home module of the initially assigned employee. No action is required on their part.

|
 Mass reassignment from the Agenda module
Access the Agenda module, then click the Work Shifts tab.


Click the Reassign button


Fill in the reassignment form;

- Assigned employee: indicates the name of the employee or employees currently assigned to the work shift to modify;
- Employee: select the employee to whom you wish to reassign this shift, or select the option No employee to leave it floating;
Filters section lets you filter the periods to reassign, so only the periods having the selected task, place, and group will be reassigned. The other periods that do not correspond to these criteria will remain assigned to the current employee.
- Period: allows selecting the period(s) to reassign;
- Work shift: allows targeting one or several specific work shifts. This applies the reassignment only to periods corresponding to this time slot;
- Task: this filter targets a specific task type;
- Place: this field filters according to where the shift takes place;
- Groups: allows targeting one or several student groups associated with the shift.

Click Reassign, then choose whether you wish to notify the targetted employees or not.

The new assigned shift will automatically appear in the Home module of the selected employee. It will also disappear from the Home module of the initially assigned employee. No action is required on their part.


If needed, click on this link to access the video of this procedure: Video: How to reassign a work shift in the ''Agenda'' and ''Work shifts'' modules?.
Was this article helpful?
That’s Great!
Thank you for your feedback
Sorry! We couldn't be helpful
Thank you for your feedback
Feedback sent
We appreciate your effort and will try to fix the article